
Build Your Own Leaf Composter

Forget the lawn bags. Save all those fallen leaves and transform them into compost! Your garden will love you for it and reward you in the most delicious way. A big thank you to Janet O. for her latest contribution to The Motherboards!
By: Janet Oswald
Decay is a glorious thing. This year I put some extra effort into making sure our compost bin had a good balance of brown and green material, and stayed on top of watering and stirring. And it paid off. We now have a beautiful batch of rich, black, fluffy compost to mix into our otherwise sandy, inanimate soil. But all the leaves we rake up this time of year had been going to waste.
They are too dry and acidic for the bacterial decay process going on in our compost bin. Too many and the balance would be lost. They need their own place to break down via fungal decomposition. So, during an unusually mild day in November, we built a leaf corral. If all goes according to plan, we will have some homemade leaf mould to add to our arsenal of soil amenders in 12 months (nature takes its time).
Here’s what you need:
● Gardening gloves
● Wire cutter
● Needle nose pliers
● Shovel
● Piece of burlap, old towel or scrap of sturdy fabric cut approx. 3’x3’
● Galvanized hardware mesh/cloth – I used 1”x1”, 9’x3’. The diameter of the corral should be at least 3’, and the mesh small enough to hold in the leaves.
● Optional – lawn mower or whipper snipper
Cost: I paid $6 for the mesh at my local hardware shop, and had everything else on hand.
Time: Less than an hour if you’re speedy.
How to:
1.  Using the wire cutter, trim the short edges of the mesh to leave lengths of wire for binding. Protect your hands with work gloves, this stuff is pokey.
2. Overlap the short edges by 3-4” to create a cylinder. Fold over the wire tails using the needle nose pliers. Work your way from one end to the other.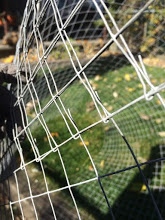
3. Place your corral in the desired location (not too sunny or drying will become a problem) and trace the base onto the ground using the shovel.
4. Remove the corral and dig a hole approximately 6” deep.
5. Fit the corral into the hole and backfill to anchor in place.
6. Fill it up with leaves. Optional, but recommended – Shred the leaves into smaller pieces to speed up the decay process. Run a mower over the leaves before putting them in the corral, or put them in a smooth sided bin and have a go at them with a whipper snipper.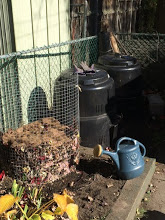
Note: I tried going over a pile of leaves with a push mower. It didn’t manage to cut them up.
7. Cover the pile with burlap (or other material) and give the pile a good watering.
8. Keep an eye on it. It needs to stay moist, so give it water as necessary. If it is drying out too much, cover it with a piece of plastic, or try shading the sides from the sun.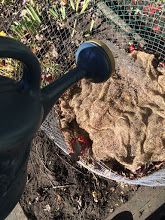
9. You’ll know it’s ready to add to your garden when it is soft and crumbly.


Trackbacks & Pingbacks