Picnic Basket
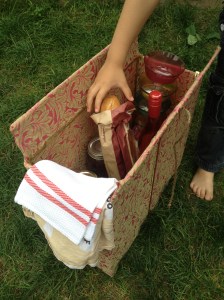
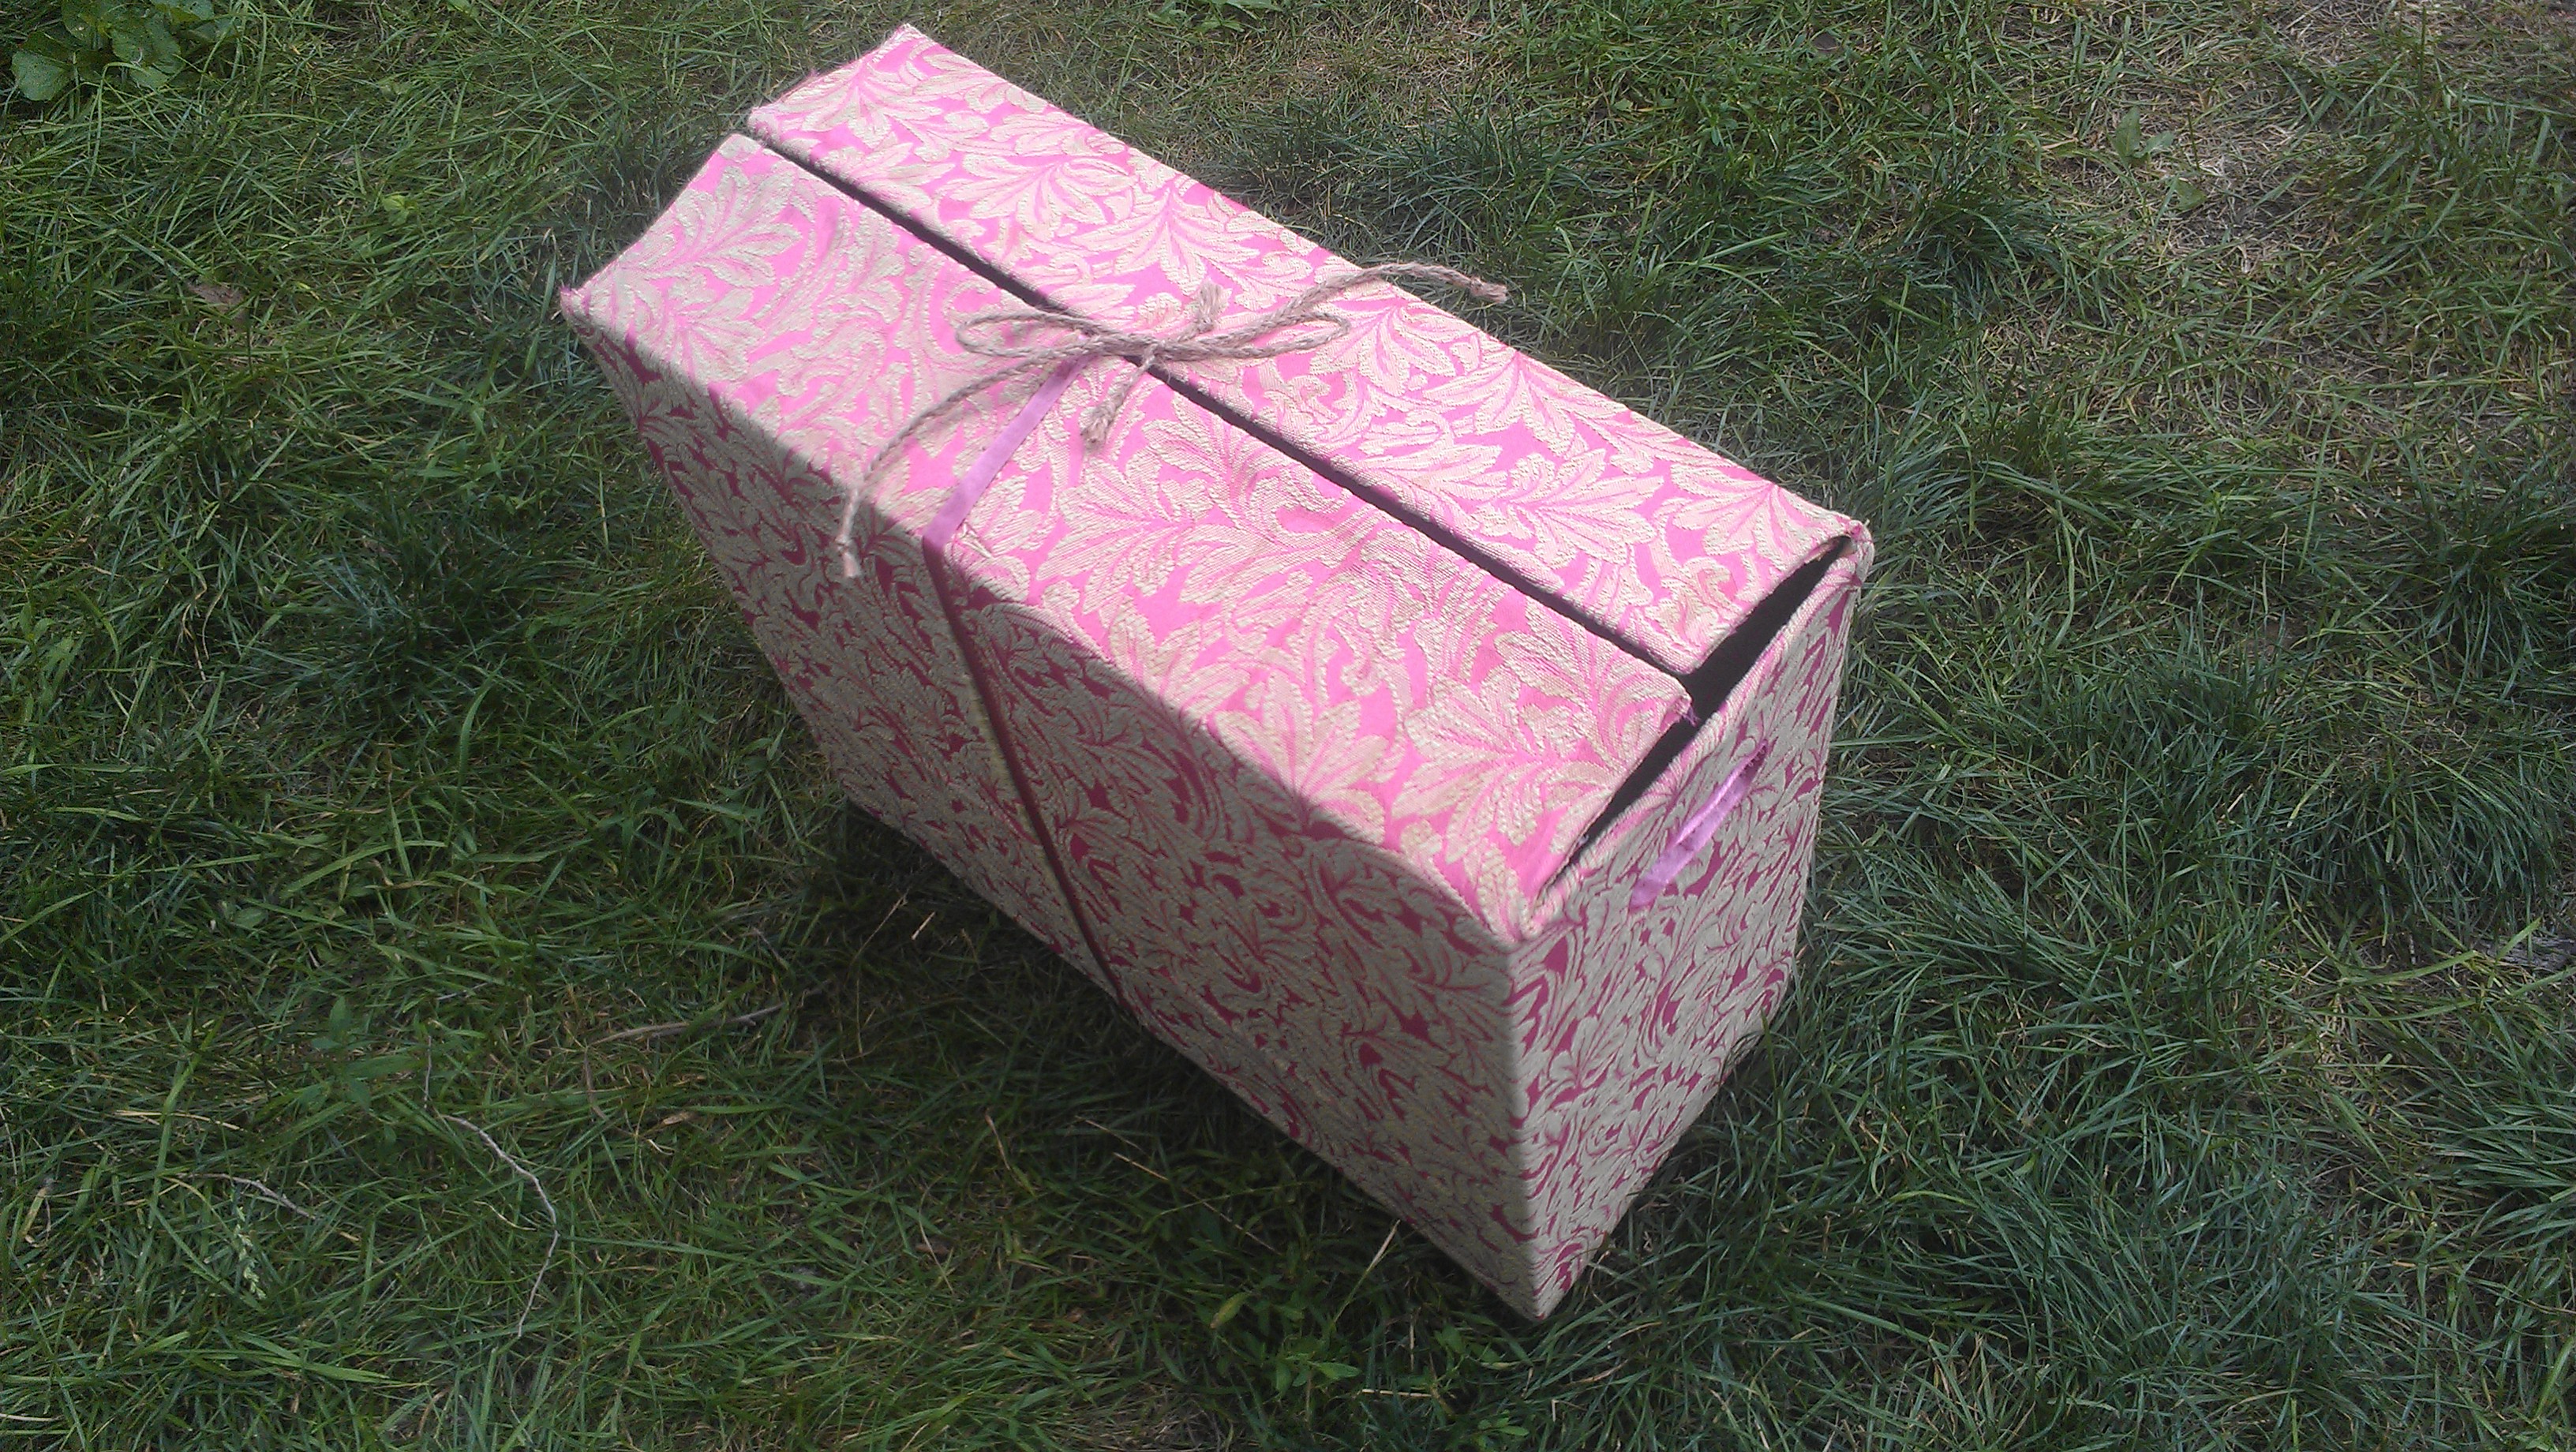
With all these wonderful sunny days, it’s a great time for a picnic. We had all the treats and drinks, but nothing to put them in. So, I thought I’d get crafty and transform and old, empty diaper box into a picnic basket. With the material and trimmings I chose, it’s a bit glitzy – sort of “Liberace goes picnicking,” but you can choose material to make it your own, and tamp down the fabulousness a bit.
By: Jodi
Working Time Required: 1 1/2 – 2 hours
Total Time Required: a couple of days, for glue-drying time.
Materials and Tools Required:
– material
– ribbon
– white glue (I just used craft glue)
– sewing scissors
– sewing needle
– thread
– material for ties (I used twine, but you could use ribbon or whatever your little heart desires)
– wallpaper roller (not required, but I found it really flattened the material nicely)
– masking tape
Project Costs:
I just happened to have all of my materials already in my sewing box, but if you were to purchase them, it would cost about $1 – $10 for material (depending on your taste), and approximately $5 – $10 for all of your other bits and pieces.
Tutorial:
1. Fit and cut material to box (all of the outside, and the inside flaps and handles).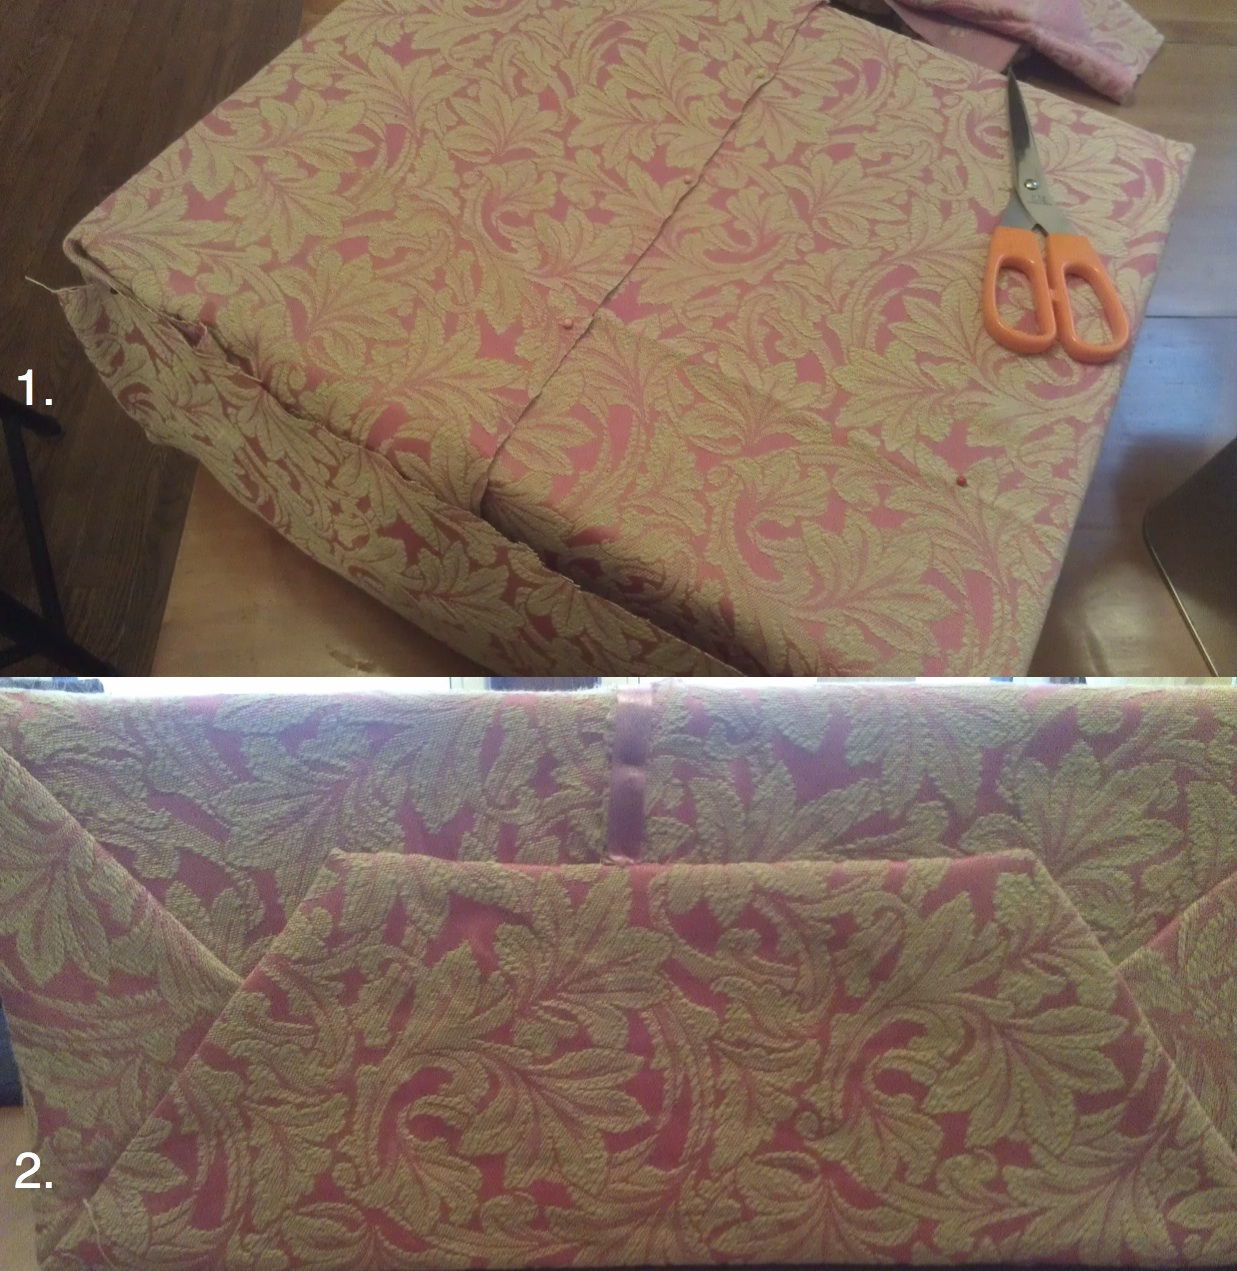
2. Wrapping like a present, glue with white glue.
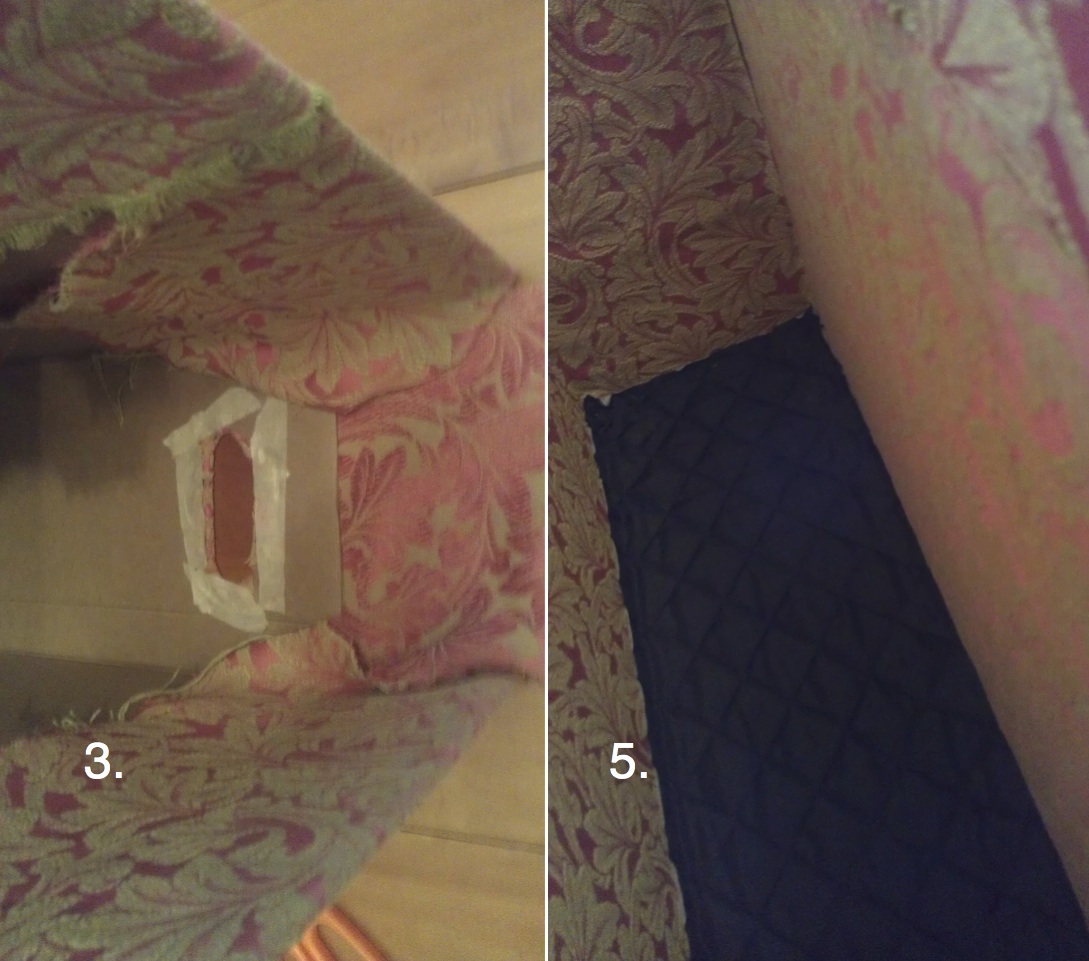
3. Cut out outside material covering handles already on box, in about 1″ wide pieces, so you can fold and glue inside. May need tape to hold down.
4. Pull material to inside of handle and trace handle from outside. Cut out shape of handle and glue material inside.
5. Cut and glue panels for entire inside of box (handle sides, just to below handles). I chose a quilted material for the bottom because I figured it would be a bit of a padding for bottles, any glass, etc.
6. Glue ribbon atop all your unseemly seams.
7. Sew ties (I braided some twine to offset the glitz of the rest of the basket) to top of flaps.
8. Pack it up, tie the ties and head out to your amazing picnic!