Fondant Basics | DIY Cake Decoration
My friend Deirdre is trained as an interior designer, and she also loves to cook. Deirdre started making cakes a couple years ago, foraging through the internet for inspiration and expert advice. Here she shares with us all of the tips and tricks she has learned to make the most beautiful cakes. Deirdre’s ideas are easy to follow and her cakes are gorgeous!
Submitted by: Deirdre Panet Francis
There is something fantastic about cakes covered in fondant that I just love. The colours, the textures and beautiful shapes, I can’t seem to get enough. I’ve scoured the internet, finding good and bad examples of cakes and methods. And although I have no formal training, I have always loved to cook.
Making a cake is a great gesture of love, and it can be very satisfying, and frankly not as difficult as it might seem. A little prep work, some youtube videos and you can be well on your way.
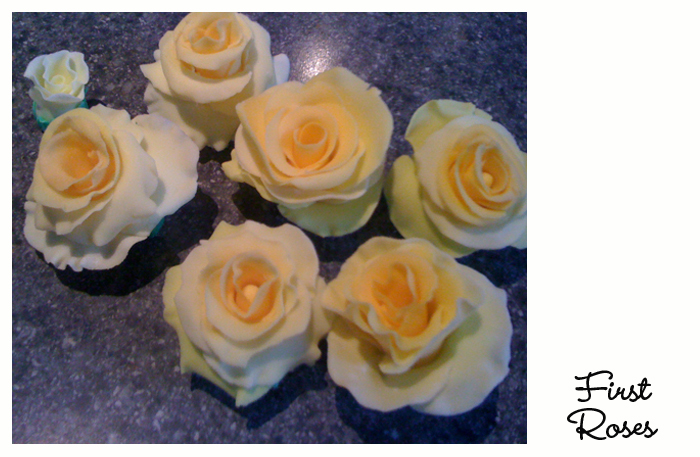
One of my first favourite sets of videos is by Edna De la Cruz. Her tutorials are excellent, especially her Gumpaste Rose and buttercream tutorials. She really got me interested in gumpaste flowers.
BAKING YOUR CAKE
There are a couple of really important things about making a cake covered in fondant.
Firstly, and most importantly, I think a cake should taste as good as it looks. So get out your favourite recipes (and you can always use a boxed product, there is nothing wrong with that)! When you are working with fondant, you need a cake that can withstand the weight of the fondant. This means that anglefood cakes won’t work. Density is important, so something more like a pound cake is a better direction.
Once you have baked the cake and let it cool enough to remove it from the pan, place it on wax paper or parchment paper and wrap the entire cake in cling wrap to seal in the moisture, and put it in the refrigerator overnight. This is also a point at which you can freeze the cake for later use & it’s advisable to further wrap it in foil or a freezer bag. An important note on defrosting, the ideal is to let it thaw in the refrigerator, do not unwrap it. This will take about a day. If you need it faster, you can allow it to thaw to room temperature on the counter, but do not unwrap it until it is fully thawed.
HOW TO TORTE YOUR CAKE (CUTTING INTO LAYERS)
The next step is to torte your cake for filling, which means cutting in into layers. There are some interesting gadgets out there, but all you really need is a serrated bread knife and a lazy susan. Even a swiveling TV stand will work for this. I did find myself a swiveling marble cheese display, at Bennix for $11. It’s great because marble tends to be cold, and cold is your friend when you are working with icing!
Another great place for video tutorials is Sweetwise.com. The best videos to watch are the cake basics series, especially the “Fondant survival,” “Level torte & fill a cake” and “Crumb coating a cake.”
Cutting the layers is done best slowly, pulling the serrated knife along the edge of the cake towards you, in short level strokes, keeping your elbow tucked into your waist, to help keep the knife level, and spinning the cake into the knife. Start slowly around the outside edge of the cake, and working your way into the middle. Once you have all your layers cut, it’s best to have a really cold cake before icing, so cover the cake back up and put it back in the refrigerator.
And one more thing, try to use a cookie sheet when moving around your layers, to keep them from breaking!
FILLING YOUR CAKE
The easiest filling is a buttercream, and if you make it with 1/2 shortening & 1/2 butter, it will give you all the stability you need for a fondant cake. I still use Edna’s recipe for buttercream.
Buttercream icing is best made the night before, and left on the counter for about an hour to bring it back to room temperature. It’s also a good idea to give it another quick turn around the mixer before you start. And there is nothing wrong with buying something pre-made!
Add filling between the layers, and keep stacking and filling. Don’t worry about what comes out between the layers, you will deal with this once stacked, but it’s better to have more coming out the sides than less – you don’t want holes or air pockets. Once the top layer is on, you need to push down on the top of the cake, to push out any air pockets. Then smooth the outside to fill any holes in the layers. Make sure to check out the Sweetwise videos on layering and crumb coat for a good description on how to do this properly.
 HOW TO “WEIGHT” YOUR FILLED CAKE
I’ve learned that it’s best to weight your filled (but not crumb-coated) cake overnight in the fridge, to prep it for the weight of the fondant and to keep it from bulging the buttercream out the sides of your cake. This can be particularly frustrating after you worked so hard to create straight sides while crumb coating!
Weighting is simpler than it sounds. After you have filled your cake, wrap it up with cling wrap, put the cake on a plate if you don’t already have a cake board under it. All you need is a cookie sheet as big or bigger than the diameter of your cake to put on top of it, or even the pan you baked the cake in, and something moderately heavy to to put on top of that, like a ceramic tile or another pot, that won’t be ruined by the moisture in the fridge (i.e. no books)! Weighting the cake takes a few hours to overnight to chill and settle. Once this is done, you can crumb coat your cake and cover it in fondant, and this will generally prevent the bulging and give you a nice smooth cake. Keep in mind that warm weather and buttercream don’t mix very well, in fact they mix as badly together as fondant and humidity! Once you have put the fondant on your cake, don’t put it back in the fridge, as it will sweat as it comes to room temperature, and that creates a sticky mess.
CRUMB COATING
Crumb coating is adding two layers of buttercream on the outside of your cake, to seal in the cake crumbs. The first layer can be fairly thin and rough, and then it will need to be chilled for 30-60 minutes, or frozen for 15-20 minutes to speed up the hardening of the buttercream. This means that you will be less likely to pick up cake crumbs into your icing. The second coat of buttercream is the finishing layer before the fondant. Any bumps or holes on this layer will show through the fondant, so this is where you want to spend a bit of time. Smooth on the buttercream all over the cake, sides and top, and make it a bit thick, as you will be removing buttercream while you smooth it out. I bought a plastic drywall tool that has a 90º angle so that I can sit it on the table while I turn the cake against it. This gives me nice vertical sides to my cake. It doesn’t take long to get a feel for this, but don’t be surprised if you have to go around the cake numerous times. And clean off your tool often, buttercream sticks to buttercream! The top is trickier, but I get the best results when I use a long knife and pull the edges of the buttercream into the middle of the cake all the way around. When it’s as close to perfect as you can manage, chill the cake again for a bit. This will make it easier to fill and smooth any small holes or bumps, and it gives you a break! Warming a knife or tool under hot water & drying it before use, can help melt areas a bit that need smoothing too.

ADDING FONDANT
So, you’ve filled and crumb coated your cake, and put it back in the fridge to chill. And you are ready for fondant. Make sure you have coloured your fondant the day before. It’s always better to let icing rest after you’ve added colour to it.
Fondant can be fantastic and fussy at the same time. Your cake, filling and crumb coat should be cold, your fondant should be well kneaded.
The key to covering your cake is to measure the diameter or width across the top of the layer, and add the height of the side twice. This will give you the total width of the fondant you need to roll out to cover the layer. Roll it out on a light sprinkling of icing sugar until it’s more than 1/8” thick. Thinner will tear too easily. It should be even and smooth. It’s best to keep it loose on the board, peeling it up and spinning it between rolls.
Once the fondant is ready, bring your cake back out of the fridge onto a counter sprinkled with icing sugar. You don’t want the fondant to stick to anything but the cake.
Roll the fondant loosely onto your rolling pin. Line up the edge of the fondant with the bottom of edge of the cake and gently roll the fondant off the pin onto the top of the cake. The idea is to get the fondant sticking only to the top of the cake first. You want to do this from one side, so the air gets pushed out. Gently pull the flaps of the fondant away from the sides of the cake and smooth the top of the cake. It’s best to have the white plastic smoothers for this task. Rub across the top of the cake in circular motions. If you find any air bubbles that didn’t get pushed out, use a clean straight pin to put a small hole, on an angle, into the bubble and use the smoother to push the air out of the hole. You should be able to smooth out the pin hole with the smoother, but since the hole is on an angle, it will also be less visible!
When you are ready to do the sides, stop and take a deep breath! This part takes a certain amount of faith, especially the first time, and I highly advise watching the Sweetwise tutorials, her method is the best I’ve found, and hasn’t failed me yet!
Start at the top of the cake, work down the sides only an inch at a time, and all the way around the cake. Carefully fluff the flaps of the fondant out from the cake as you work around, like a dress maker would do with a wedding dress. As you work down, an inch at a time, you will notice some areas getting thick and hard to work around the folds. Fondant has a lot of elasticity to it, and you can mold it into the shape you want. The key is to do it slowly, working your fingers back and forth gently, and keep lifting the fondant. As long as it hasn’t stuck to the sides of the cake yet, you can adjust it! And if all else fails, you can always pull it off, re-coat the top layer of buttercream on your cake and start again! The other thing to remember is that if you are going to add more decorations to the cake, you can cover areas that didn’t come out as cleanly as you would have liked!
Once you have cut off the excess fondant at the bottom of your cake, you can run your smoother up and down around the outside of your cake and fix any ridges. If you have two smoothers, you can follow Michelle’s technique for sharp edges. She also fills and crumb coats her cakes with ganache instead of buttercream, which I do sometimes. Also check out her ganache tutorials, they are excellent too!

DECORATING YOUR CAKE
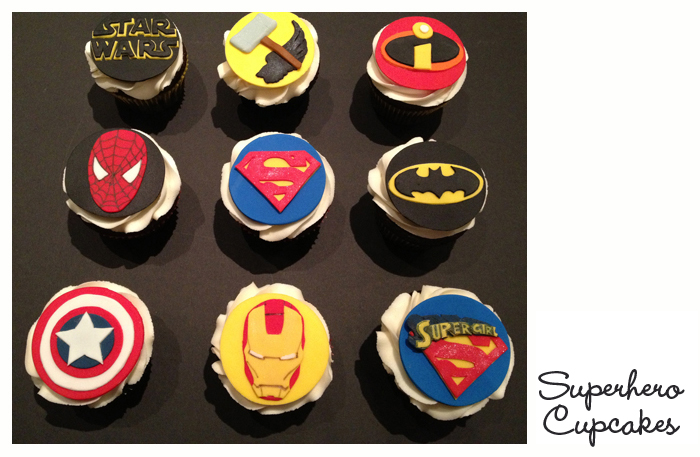
Decoration is a matter of taste, and the options are endless. Just cutting out some lines of fondant or other shapes can be an easy start. I’ve printed out shapes on a printer, cut it out with a blade & used that as a template for shapes or letters of fondant. Using a small paint brush with a very small amount of water will easily glue fondant to fondant. Once water comes in contact with fondant, it will always be sticky, so be mindful of over spraying! And you can use a steamer on your cake to create shine, but be careful not to overdo it. Also, if you still have some icing sugar on your cake, a dry sponge, gently rubbed across the surface will usually pick it up, but dark colours are not as forgiving.
Toothpicks are handy items to use for bigger shapes, flowers or figurines, and a piece of hard foam is a great tool for keeping your creations off the counter while you work on them and for mounting into a cake. Uncoated metal is not recommended for inserting into a cake, but you can cover wire with floral tape.
Fondant will never harden completely, and it will absorb any humidity in the air. There is a sad drooping that happens as the humidity rises! You can buy gumpaste ready made or add Gum-Tex powder to fondant (making it gumpaste!) which will allow it to dry harder. Humidity is always a factor, so keep that in mind. If you watch Cake Boss, you will notice that they use Rice Krispies Squares as the base of any bigger shapes they are creating, and cover those in fondant.
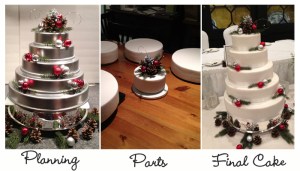
PLANNING & TRANSPORTING TIPS
Planning is important before you start the cake. Give yourself enough time, but have fun! I get most of my supplies at the Bulk Barn or Michaels. They have an amazing array of products, from coloured fondant to flavourings for your cake & buttercream. And they have lots of tools as well.
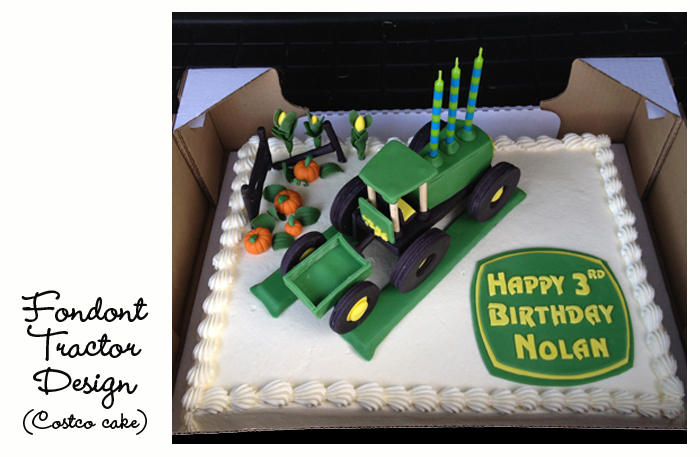
As part of your planning, don’t forget to think about transport. At some point your cake might need to leave your house and get to a party. I think I aged about 5 years getting Nolan’s John Deere cake to his party, every bump and stop made the tractor shimmy dangerously on its axles. Somehow we made it in one piece, but I won’t ever forget that experience. I’ve made good use out of non-slip shelf liners cut into small square to fit under cake boards and my sister suggested transporting decorated muffins in the baking pans…brilliant? You need to keep things off the sides of containers and upright, and don’t forget to keep emergency repair materials with you!
I haven’t covered anything about piping buttercream decorations, but that is an option as well, so be creative!
And remember, while your nose has been about 3 inches from the cake for hours, everyone else is going to see the cake as a beautiful piece of artwork that you created, and will not notice the tiny imperfections of any small element. It’s the Gestalt of it all, and the love with which you created it!
Dierdre is a stepmother of two, interior designer by day, and cake decorator by night.