
Baskets and Bunnies | DIY Easter Basket

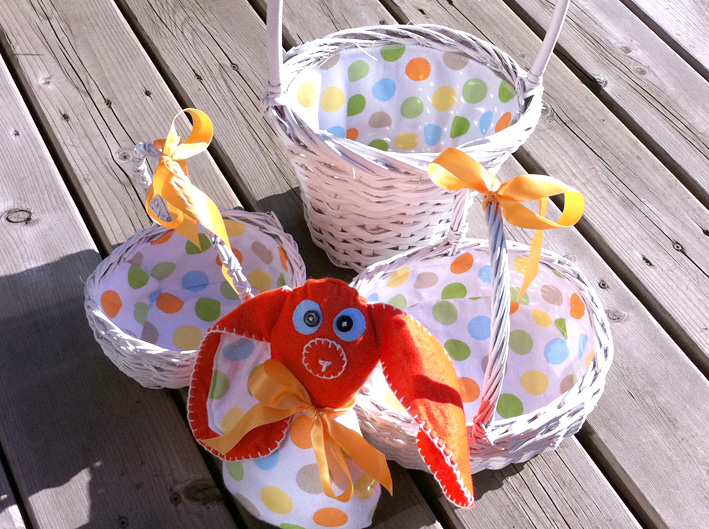
It’s almost that time of year. Chicks, bunnies, eggs and, for me, tons of chocolate. We usually get the family over for lunch and an Easter egg hunt. Last year we had 3 toddlers and a newborn in the hunting troupe. I decided to make some fun little baskets and, for the newborn, a bunny to match. Needless to say, I scored some mega family brownie points!
How long does it take to make this project? 2 hours
Completion time (including paint and glue to dry): 2 hours
How much did it cost me? Not much, $3.99. I used old baskets and fabric from a cute flannel swaddle blanket I had never used and I had ribbon in my craft basket, but if you have to buy those it would be $1-2 per basket in the dollar store and a few dollars for fabric. The $3.99 was for white spray paint (again from the dollar store). Note: this is not great spray paint so I would not recommend it for durable projects. Since these baskets were made for an hour of Easter egg hunt fun I was not too concerned about the paint.
What do you need?
Spray Paint (in the color of your liking — for example think lemon yellow baskets!!)
Fabric (any cute fabric to line your baskets with — you decide. Recycle or buy new).
Felt for the bunnies ears, head and nose
Stuffing
Buttons for the bunny’s eyes (but you can also use fabric, or stitch the eyes…get crafty YOUR way!)
Ribbon for the top of the baskets and around the bunny’s neck
Instructions
Baskets: Get some old baskets or some new ones at the dollar store. Spray paint them in a matter of minutes and leave to dry. There are no patterns for the basket linings as it all depends on the size of your baskets. Just freestyle it. Cut a circle of fabric for the bottom of your basket. Then, measure the diameter and height of your basket and cut a strip of fabric according to those dimensions. Sew together on your sewing machine and insert into basket. Then fold the unfinished edge of the fabric outwards (to the inside of the basket) and with thread and needle simple loosely stitch the fabric to the basket. Add ribbon on top of handle and voila! Hello Easter Basket.
Bunny: Download pattern and print bunny pattern the motherboards (or freestyle your own!). Cut fabric (2x body, 2x ear, 2x smaller ear in other pattern) leaving about half an inch extra fabric all around the pattern. The pattern includes body and ears. For the other fabric inside the ears, just use the same ear pattern without adding the extra 1/2 inch. Eyes and nose, simply cut circles to the size of your liking. Sew the ears with the 2 fabrics first, stitch ears to head and only then sew body. stuff. Then add face details (nose, eyes). I used some fun stitching around the bunny ears to add detail. HOP HOP!


Trackbacks & Pingbacks