Easter Craft | Easy Felt Bunny

I like bunnies. Who doesn’t? I featured a bunny sewing project before on the ‘boards and am doing it again. A simple felt purple buddy this time to match my daring bold purple table setting.
By: Liesbeth
Materials Needed:
- 2 colours felt (I used a dark and middle-tone purple). You don’t need much. 1/4 yard minimum if you buy from a roll or if you buy the pre-cut squares you need 2 for the main body colour and 1 square for the bottom of the bunny.
- tiny piece of a fun, patterned fabric that goes with your felt colour selection.
- purple and pink embroidery yarn ( I found mine in a multi-coloured pack at Dollarama)
- stuffing (ps: I have been using an old pillow for all kinds of projects that needed stuffing)
Tools:
- sewing machine (optional as I only used it for the ears, but you could do that easily by hand)
- sewing needle
- scissors
- printer to print the pattern
Instructions:
Select felt colour of your choice. I liked the tone-on-tone purples for my bunny with the contrasting ears but you can go any way you want.

Print your bunny pattern: themotherboards-easter-bunny-pattern
Follow the instructions on the pattern and cut one bottom from the darker felt and from the lighter felt 2 bunny sides and 2 bunny ears. Also, cut 2 more ears from the other patterned fabric.

Use the sewing machine to sew each patterned ear on top of the purple ear and turn inside out:
Follow the instructions on the pattern and stitch the bunny together by hand using the blanket stitch. If the below photos do not help and you have never done this stitch before, here is a good tutorial with very detailed steps. Make sure to leave about one inch of your bunny open at the back for stuffing later on.

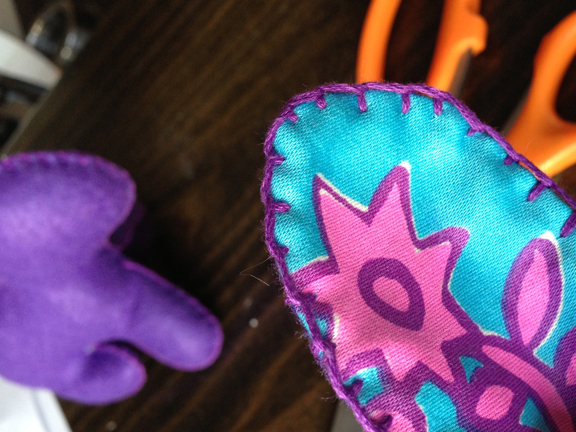
Also make sure to do your bunny ears around the outside (leaving the short side open for now):

Then, using thinner thread (just split your embroidery thread), close the bunny ears on the short side and sew a small pleat in the middle of the ear:

Do not attach the ears to your bunny yet. It is easier to do it after stuffing the bunny as you will be able to find the right placement of the ears. Go ahead and stuff your bunny. Make it nice and firm but not too much, you dont want the poor thing bursting at the seams:

Close bunny. Attach ears and, using the pink thread sew on a nose, mouth and eyes. Hop, there it is:

Also see our previously featured bunny:


Trackbacks & Pingbacks