Stair Rejuvenation | DIY Living
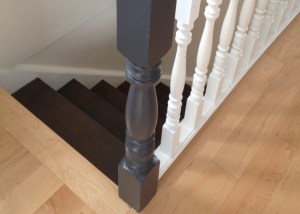
Gail had recently updated her house, but the stairs were still timeworn and tired. They considered the options – a carpet runner, replacing the risers, etc., but what they really wanted was a modern look that was also functional and easy to clean. So she took on the DIY challenge and decided to redo the stairs herself. And she nailed it! Her stairs have gone from old and worn to clean and modern in only three days time.
Submitted By: Gail Martiri
Total Work Time Required: About 2 hours per day – total 6 hours
Total Project Time Required: Three days
Project Costs: $80
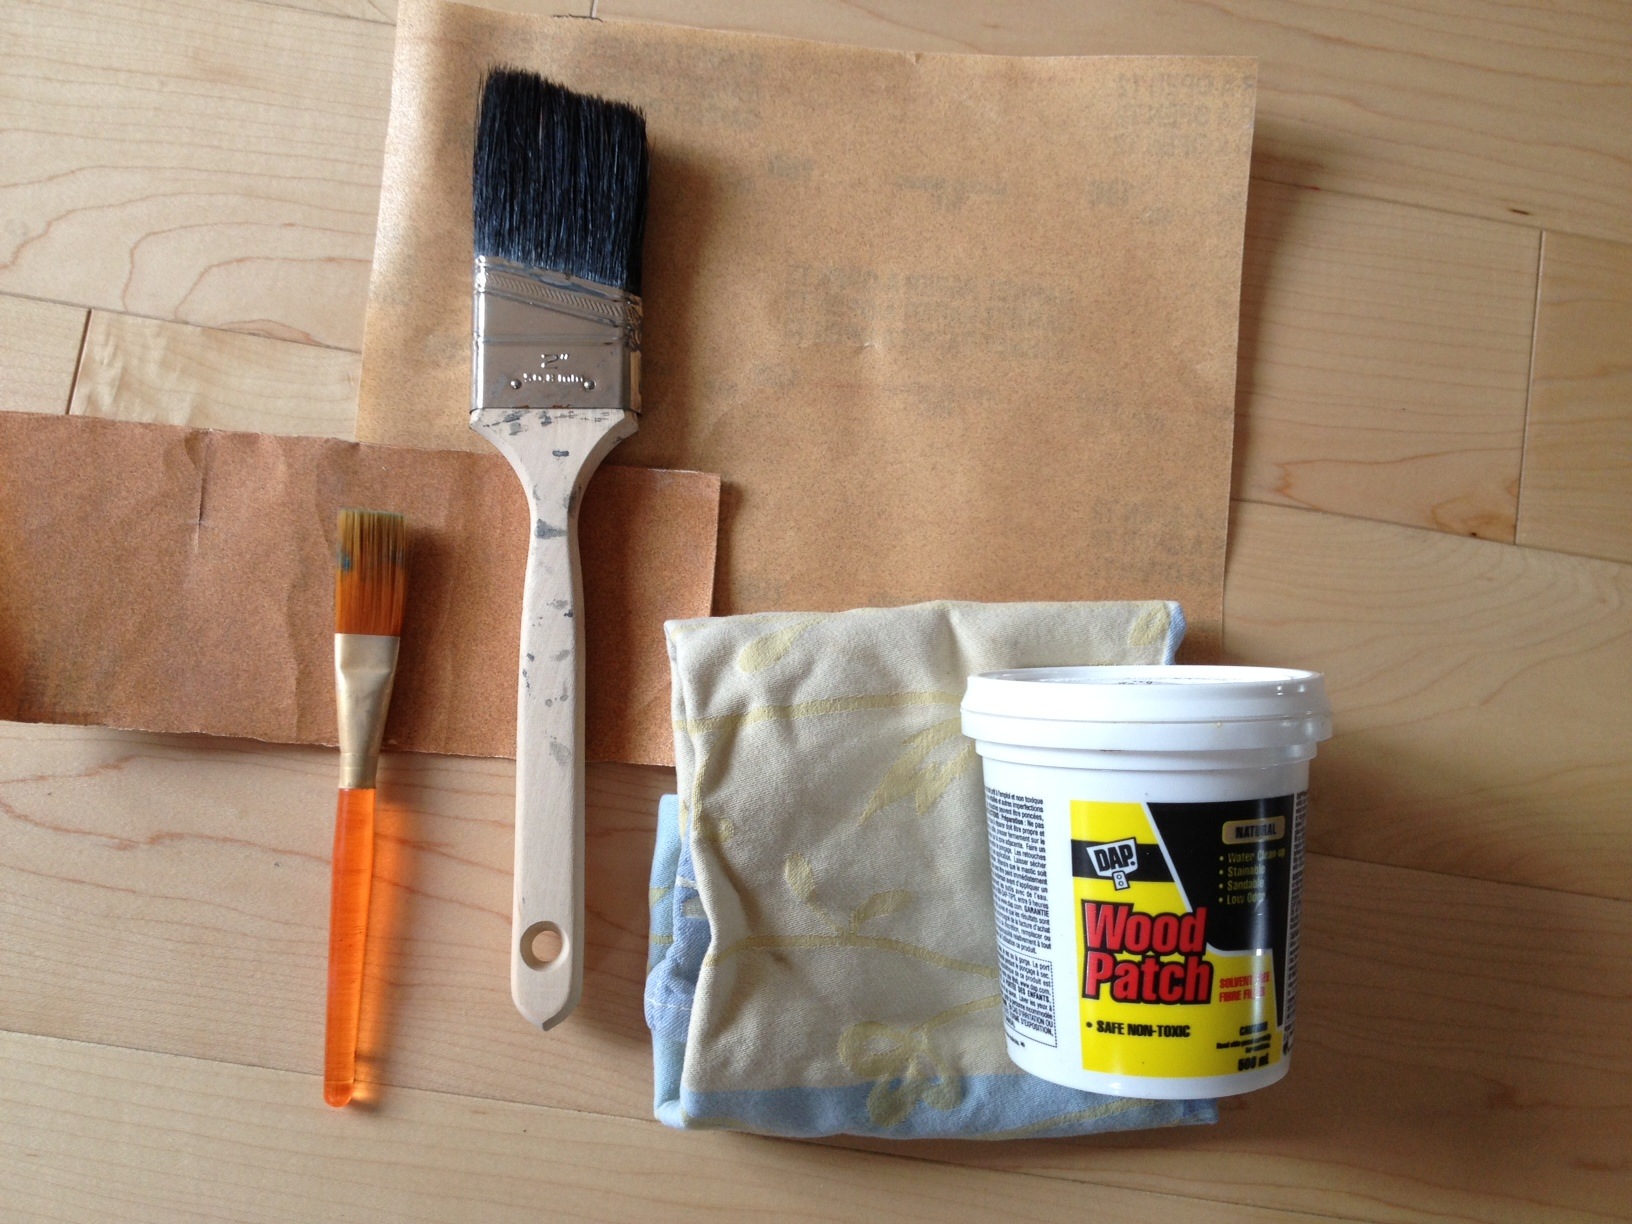
Material and Tools Required:
- Sandpaper – a medium and a fine (or extra fine) textured sheet.
- Good quality brush for paint and varnish. I bought one and washed it for use with both materials.
- Clean up and buffing cloth. I used an old dishcloth.
- Paint for bannister, risers and spindles. This comes in all Benjamin Moore colours. I chose flat finish white for the spindles and risers and a satin finish warm grey coloured paint for the banister.
- Grey toned varnish for stair treads – I used Saman brand. This also comes in a huge array of colours from discreet honey-coloured stains right on through to magenta for the more daring.
Tutorial:
Step One: Make sure that stairs are clean, with no dust. This is important — even though they will soon be super dusty from sanding. Starting with a clean stair will make your sanding job a lot easier and less gross.
Step Two: Sanding: using either a small rotary sander or just plain old muscle, sand the finish away from your stairs. This is especially important for stairs that have already been varnished. Using the medium textured sandpaper, work hard to try to take off as much of the old varnish as possible. For painted parts – i.e. the bannister, spindles, risers or any other part of stair that you would like to repaint, just give it a good roughing up. This is crucial so that your nice, new finish – either paint or varnish – will adhere to the surface and look even. Make sure you get into those corners – it will make your final job look a lot more professional.
Step Three: Clean it all up. Use warm water and nothing else. Make sure you get all that dust off (use a Q-tip in the corners of treads and other parts if you have to). If you have any OCD tendencies, this is the time to let them flare up. The better you clean to remove dust, the better your paint and varnish will coat the surface and the better your final job will look.
Step Four: Start painting. I painted the spindles and risers first, then the bannister. Use light thin coats, not one thick globby one. This will produce a more even texture.
Step Five: While these were drying, I started to varnish the stairs. Starting from the top tread, working down to the bottom. Again, use thin, even strokes. If you find the colour a little light, don’t worry, the next coat(s) will deepen the tone. It is best to apply a couple of thin layers to get the colour you want – one is not enough and it makes the varnish appear streaky. Remember, it will take 3 hours to dry before you can touch it, so you cannot walk on it. At all. Ditto for kids and dogs. If you have kids who do not always obey instructions or are as curious as mine, do this job at night when everyone is in bed. And yes, I did sleep on the sofa that night. Buy low VOC paint and varnish if you take this route – less noxious smells while you are sleeping….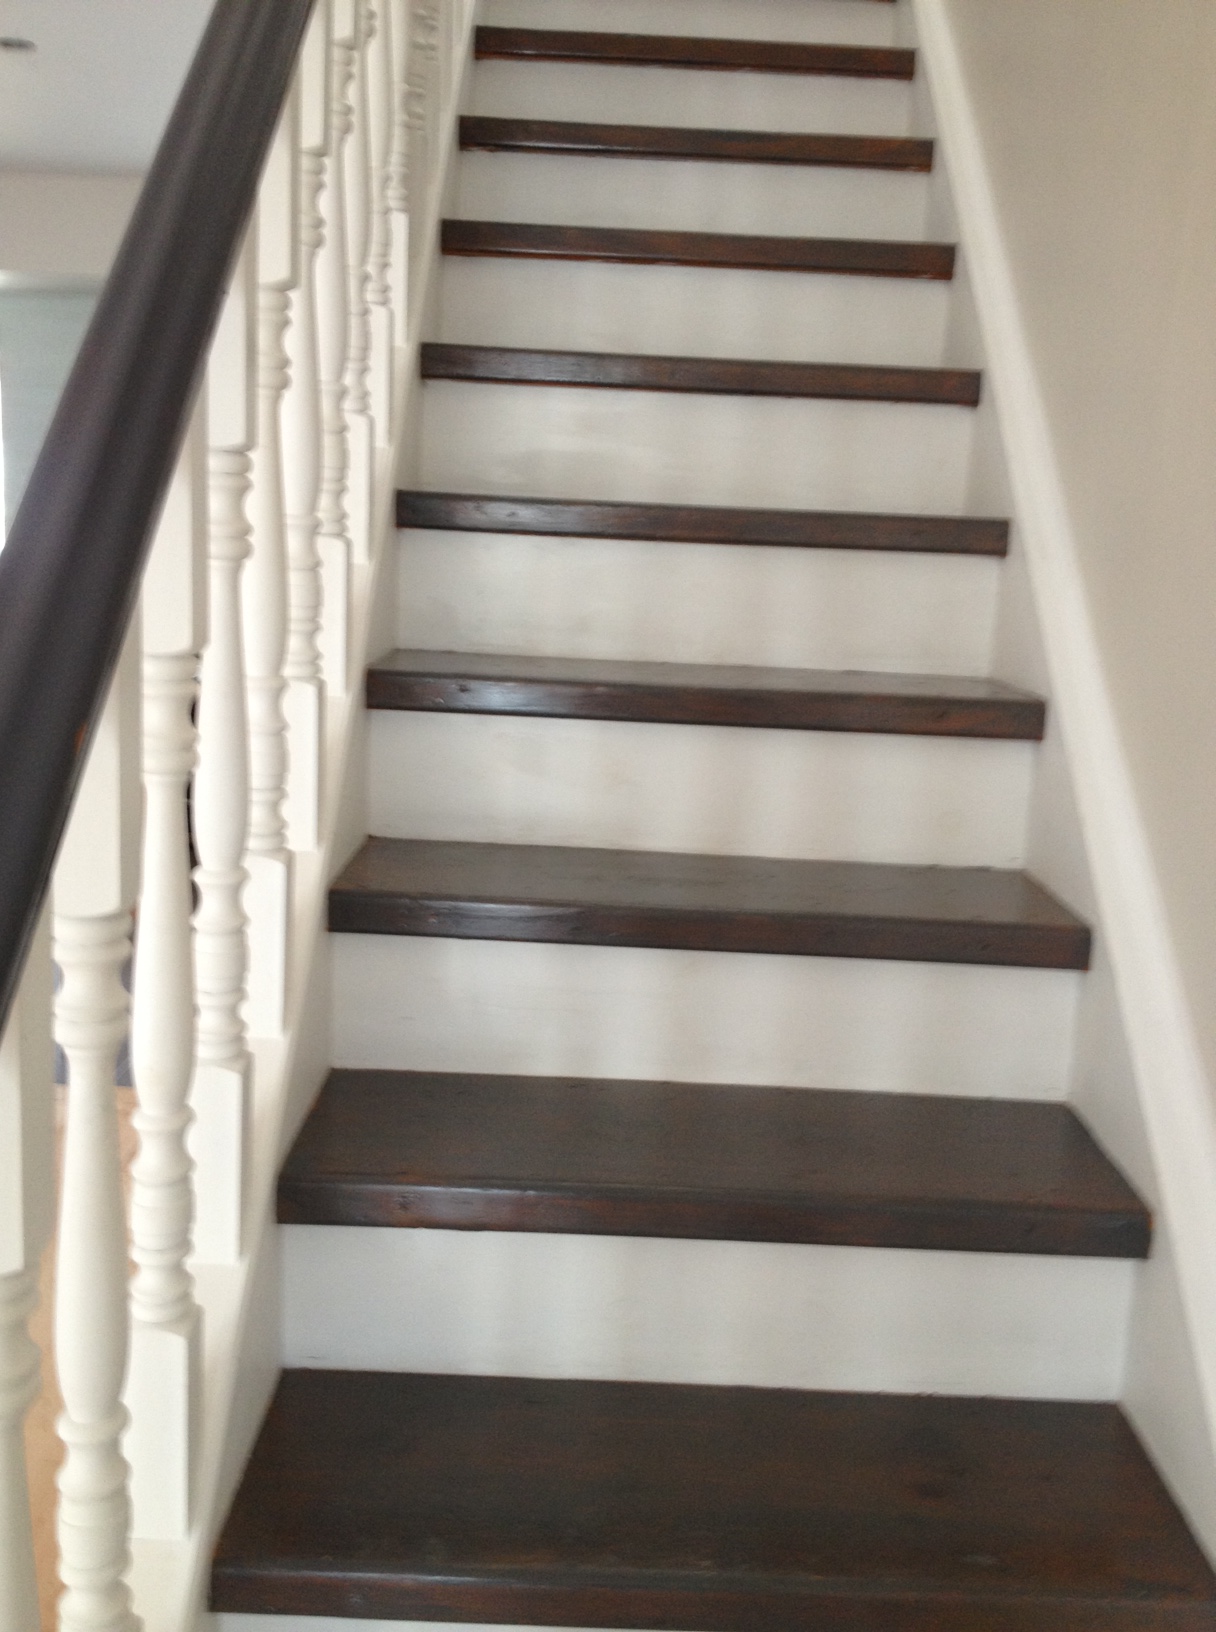
Step Six: Finish painting. Same drill for the second coat. However, be sure to use the fine sandpaper to rough up the surface between coats. Again, this will provide the paint and varnish a better surface to adhere to and will make your finished stair smooth. I applied two coats as recommended by the instructions on the paint can as I wanted a transparent look. If you would like a deeper tone you could certainly provide a third coat of varnish. Two coats of paint on the spindles, risers and bannister will probably suffice.
Step Seven: Pour yourself a glass of wine. Stand back. Admire. Take all the compliments that will come your way.
Gail Martiri is mom to two great girls, and is a government relations consultant. Growing up, Gail’s mother moved their furniture around a lot and fuelled her daughter’s obsession for DIY. Gail sews, crafts, and is a serial redecorator.