Junk to Funk part 2: Kitchen Side Table
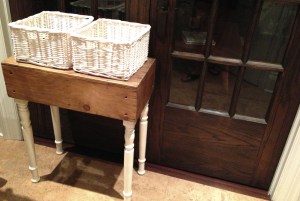
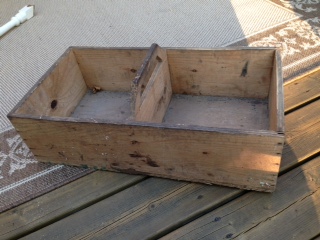
Remember I ventured into the spider-infested space under my front porch and found all kinds of junk? (from Junk to Funk Part 1 • side table). Well, that same expedition delighted me with a very old wooden home-made toolbox and about 30 wooden spindles I assume were part of the old stairs in our house pre-reno. Putting 1 and 1 together, a kitchen side table was born.
By: Liesbeth

Project Time:
1.5 hours (excluding drying time)
Project Costs:
Nada, nothing, zip, zero (I had all I needed in-house and the main materials were my junk treasures).
Materials & Tools:
- One old wooden toolbox or any wooden box will do
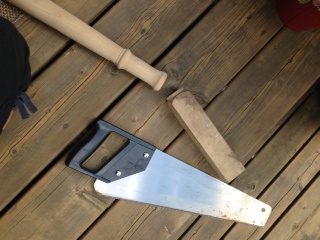
- 4 spindles
- Saw
- Wood paint and varnish (I wanted to have the legs extra glossy so used some extra varnish, but if you are using high gloss paint you can skip that on the table legs and only use it for the table top).
- Drill
- Screws (16 – 4 for each spindle / table leg).
Step by Step:
Cut the rectangular part of one end of each spindle. Those parts become the feet of the tablelegs and the rectangular side will be the side you attach to the tabletop.
Sand the spindles as good as you can. Mine were unpainted but very old and dirty so I spent quite some time to do a good sanding job. I spent even more time on the fairly rough wooden toolbox to make sure it was as smooth as I could get it.
Pre-drill screw holes in the wooden (tool)box to ensure the wood does not split. There is no need to pre-drill the spindles.
Attach each spindle to one corner of your box or toolbox using 2 screws on the 2 sides that are touching the box. Screw on very tight.

I did not cover the screw heads with wood filler as I liked the contrast of the rustic look of the top of my table with the smooth, elegant, white legs on the bottom of the table.
Paint legs of table white (2 coats). I did this, on purpose, post-attachment to the box, as you can cover everything you need to cover without risk of staining the tabletop. Plus, it is so easy to paint the legs when they are already attached to the tabletop and you simply but the table on its back.
Varnish (tool)box. I did about 4 coats as the old wood needed more coverage and I wanted the tabletop to have longevity.

And there you go. Another pile of rubbish transformed into a custom piece to love.
Tip: I added a few white wicker baskets I had bought at Ikea years ago. One is for sunscreens (everyone in the family is on a different factor) and the other for keys, wallets and sunglasses. The table is positioned right next to the sliding doors of the cottage leading into the kitchen (the first place to enter and last place to be for beach comings and goings. This table is possibly our most used piece of furniture in our cottage.