
Mini Mud Room

In our hallway, right next to our front door, is a tiny nook which usually looks like a shoe graveyard. What a perfect little spot to make a small mudroom for my small mud monster Liam. A place where he can get dressed to go outside and keep his shoes, backpack, coats, hats and gloves. Just in time for winter!
By: Liesbeth
Supplies
- 3 pieces of pine wood 2x2s for attachment to the wall (bench support) / 1 piece 4″x 1″ for the front of the bench and a 1″ thick sheet for the top of the bench. Width and depth of your bench is depending on the size of your space (home depot)
- wood stain (home depot)
- black wall screws (home depot)
- sanding paper (home depot)
Steps
All the wood together came to around $15. I already had the wood cut to size in store.
I measured the nook and my son to find the right height for the bench. I wanted him to be able to sit on it but I also want this to work for a number of years so I made it a bit too high for him right now (his feet dangle) so he can still grow into it.
I pre-drilled the pine 2x2s and used 3 wall screws for each piece to attached them firmly to the wall on 3 sides. You want this to be done well as all the weight is going to be resting on these pieces when your child sits on the bench.

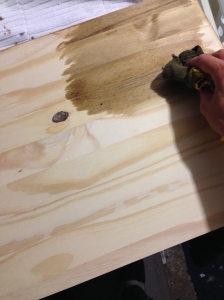
Then my favorite part. Transforming cheap pine into fancy weathered oak. For a recent project (picture-ledge) I successfully mixed 2 colors of woodstain to get this greyish-brown look, so I did the same thing again. Note I pre-drilled the wood prior to staining which is essential if you want this to look authentic.

When the stain was dried well, I applied a few coats of satin clear varnish to protect the bench. Matte varnish would have an even better look but is not strong enough for something that is going to be used this much. Satin is the best way to go and is not shiny at all, keeping the authentic old wood look I was going for.
I then attached the bench top to the supporting wood I had attached to the wall, using black screws that add to the vintage look. After attaching the bench top, I then attached the front of the bench to the top and the supporting wood below.

I then added some vintage looking hooks above the bench at a height tall enough so coats hang free from the bench and low enough for my son the reach them.

Mini mudroom complete


Love the hooks…where did you find them?
Believe it or not,
Home Depot Ryan! About $5 a piece if I recall correctly. They look nice and the double hook is a must to accommodate all the stuff.