
Kitchen Nook Reno
Now that it’s finished, I wonder why I did not tackle one of my fave spots of the house earlier. All the ingredients to make this special were there already: great build-in benches, tons of natural light due to all the windows surrounding it, and the actual window treatments themselves.
By: Liesbeth

What I liked about how I tackled this project is how I partly upcycled and created myself, partly bought some really nice stuff ignoring price tags, and partly had things made by others. Though I am a firm believer that you can basically make anything yourself as long as you do the research and you use some common sense, there are times where it is not worth making something yourself when others can do so either faster, cheaper or simply better. More about that later.
Colour Scheme
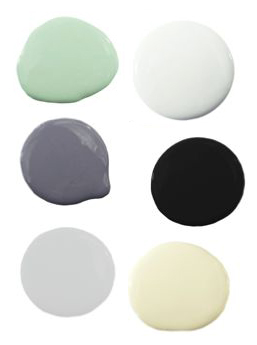
I like the existing paint in my kitchen nook. The gray simply works well and is seen a lot in décor right now. Surrounding various shades of gray with white, off-white (not too creamy/yellow) and black accents (window details, accessories etc) and softer greens (from, for example, some plants) is pleasant without being boring.
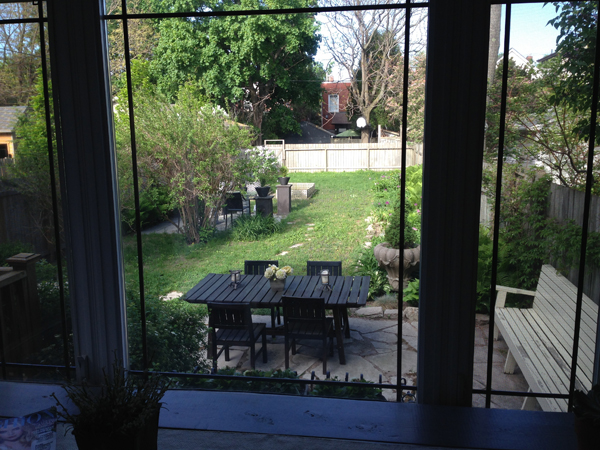
I also had to take the outside in mind. My kitchen nook overlooks the backyard and the landscaping I have done there has an impact on the look and feel of the kitchen nook. The dark gray furniture there now really compliments the scheme indoors (or visa versa).
The current “base” color scheme is completely consisting of neutrals and I did this on purpose so I can add seasonal colors to switch things up temporarily without having to get married to an actual non-neutral colour. For example, I can add some lemon throw pillows and placemats to switch up the scheme for summertime (lemon goes amazingly with grays).

Tangerine is still going strong too and would be a great addition to my base scheme.

Or I can stick with what I have but play up the greens especially in spring and summer when I have so much green outdoors as well.

Adding blue is another no-brainer. Either turquoise (for happy pop) or soft dusty blue (for understated natural) would be pretty.

I can add more whites and silvers for Xmas or even rustic, old-school dark green and red. You get the idea. Ohhh, so much fun to be had inventing and reinventing this nook whenever I feel like it.
MAKE IT YOURSELF. The table: DIY top and leg modification
Our house came with this table and I have always kinda liked it but not loved it.
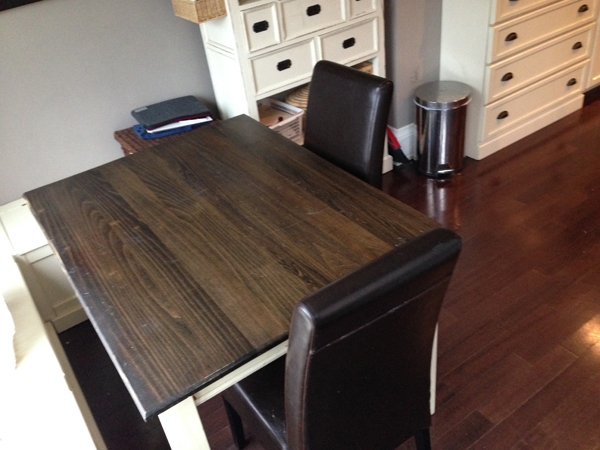
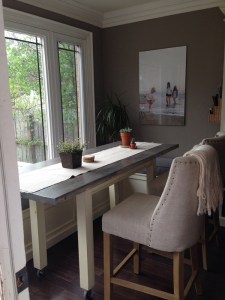
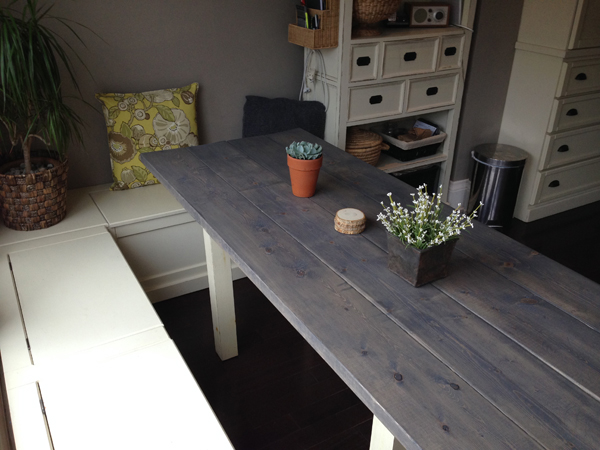
I wanted a higher table (counter height), something harvest-style but unique. I also wanted the shape to fit the nook much better, meaning less width (30”) and much longer (6 feet). The final “must” were table legs which would not hinder sitting down and getting of the benches. We were always knocking our knees into the current legs, located on the outer corners of the table. I decided to make a new top from scratch (wooden planks) and modify the legs to completely narrow the frame (positioning the legs away from the edge of the table). The height issue was solved with metal casters, adding a good 4 inches.
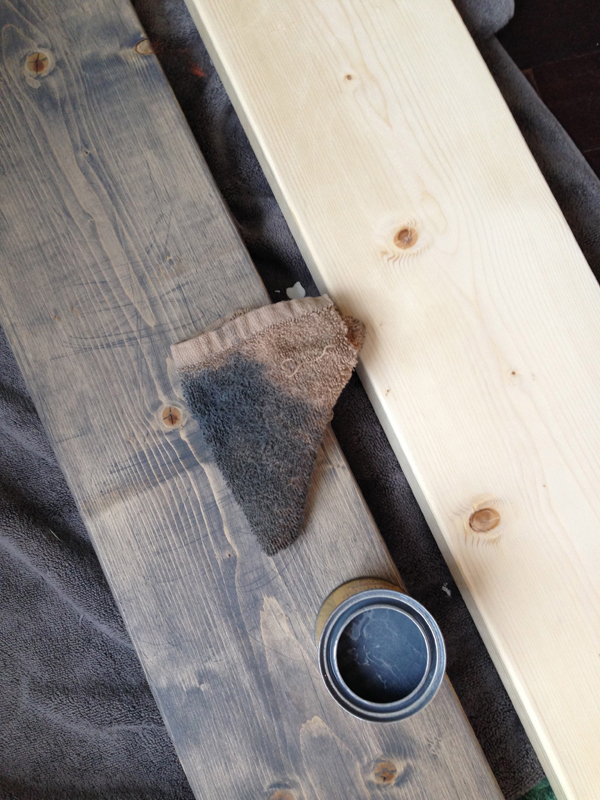
I got pine wooden planks at Home Depot (1”x 8”x 12′) and got them cut in the middle there for free, getting me 4 perfect 1x8x6 planks. I also got some ½” thin planks cut to 28” to cross my main planks on the bottom. I used the sander to do a good sanding job.

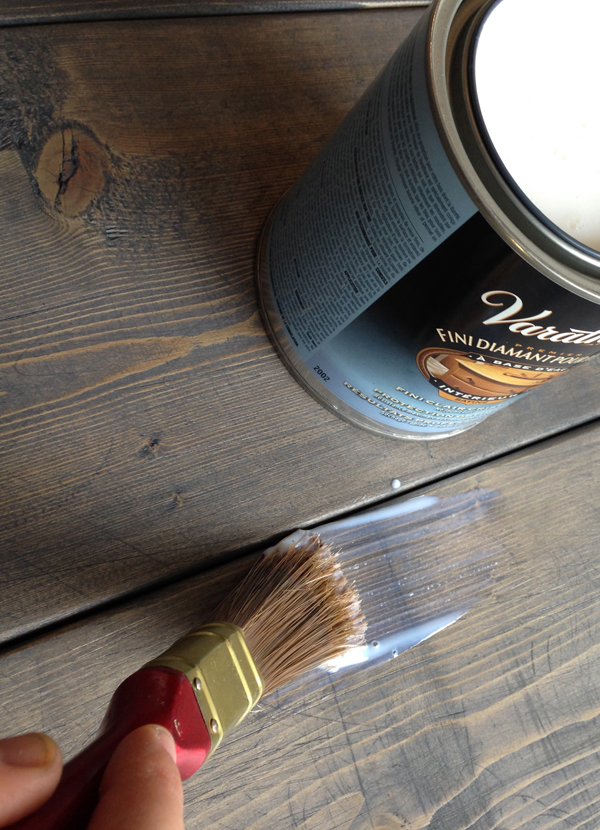
I then stained the planks prior to assembly (this is important as it is difficult to stain the edges of the planks after assembly). I used wood stain from Home Depot. I bought the tiniest jar and still only used 1/3 of it. I did 2 layers of stain.
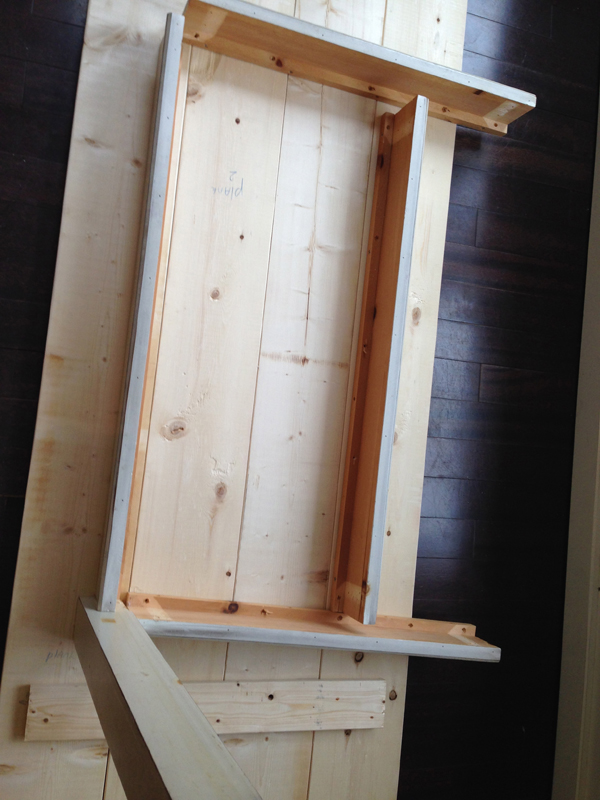
Next: assembly. I did all assembly on top of an old fleece blanket to make sure my perfectly sanded and stained planks would not get scratched or dented in any way. I used the smaller cross planks and attached them to my planks (first ensure to line up the planks perfectly). Always pre-drill holes or your wood will crack.
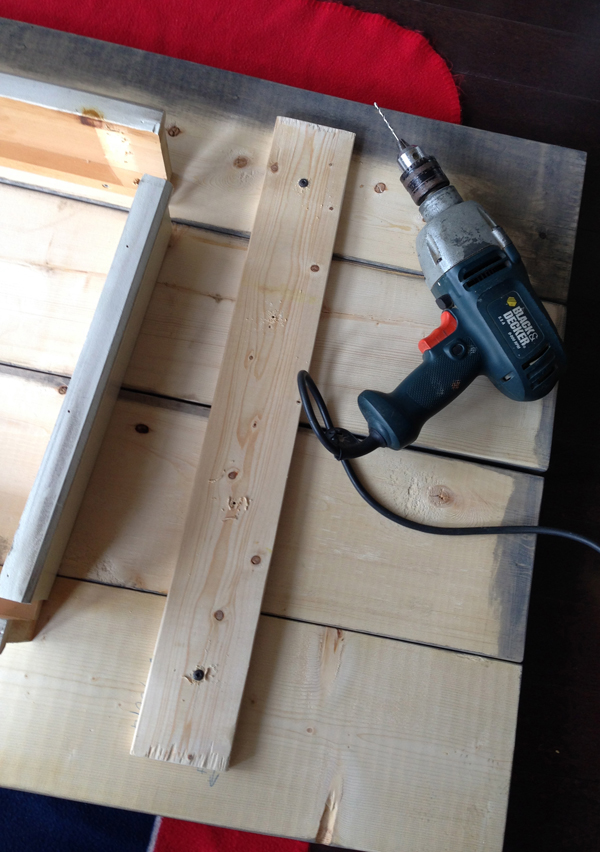
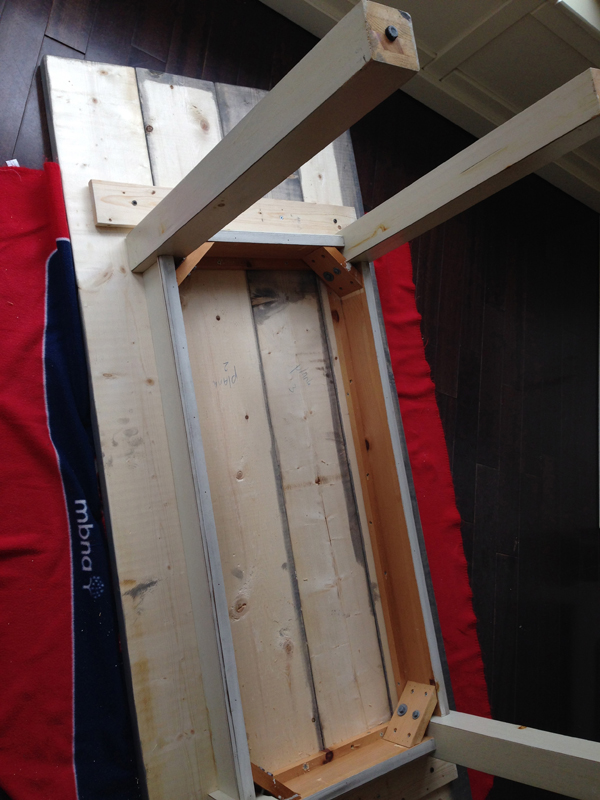
Now here is where the common sense part comes in. I have never made a large table but it’s a simple case of investigation and staring at the bottom of a few existing table to figure out they are pretty much all made the same way. I then took the existing bottom part of the old table, disassembled all of it, shortened the width by simply sawing off 14 inches on the two shorter ends and then put it all back together in exactly the same way on top of my up-side-down new table top. Voila.
The final touch was 4 layers of a sheer satin top layer. I wanted to have a matte finish but it is simply not practical to do so with a high-use table like this. The simple rule is that the shinier the finish, the stronger. A good compromise is using a satin finish. It really is not shiny and it is much stronger then matte. I do recommend multiple layers to ensure your wood is well protected and can stand some abuse. Who needs pretty furniture that’s pretty for one month only? Note the satin varnish looks milky when applied but dries completely clear. I now actually really like my satin finish.
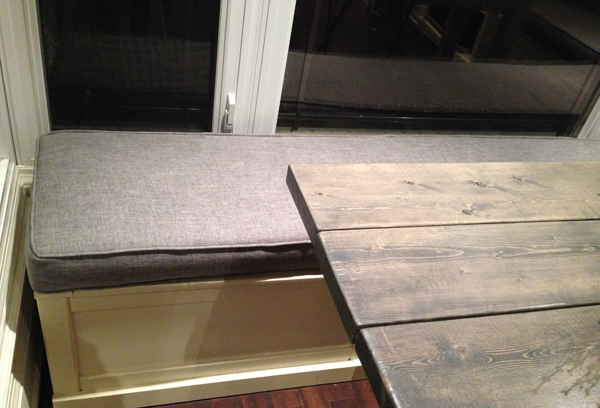
LET SOMEBODY ELSE MAKE IT – Custom Bench Pillows
To make the benches more comfortable but also higher (remember the table is almost counter height), I added bench pillows. This was going to be a custom job and a big one as the longest side of the bench is 104 inches. I considered doing it all myself but when I investigated the costs for high-density 5 inch foam online, things became super pricey. When I visited my fave fabric warehouse in Toronto’s Junction, the lovely ladies there quoted me on the highest quality foam, plus some really nice gray fabric and getting it all made (incl. piping, zippers etc) and the price came close to the “foam only” price I found online. This total custom job got to around CN$350, which really is a steal. The best part? I like to DIY and sew but this job would have been a big and advanced sewing job for me and I would have never been able to do it this professionally.
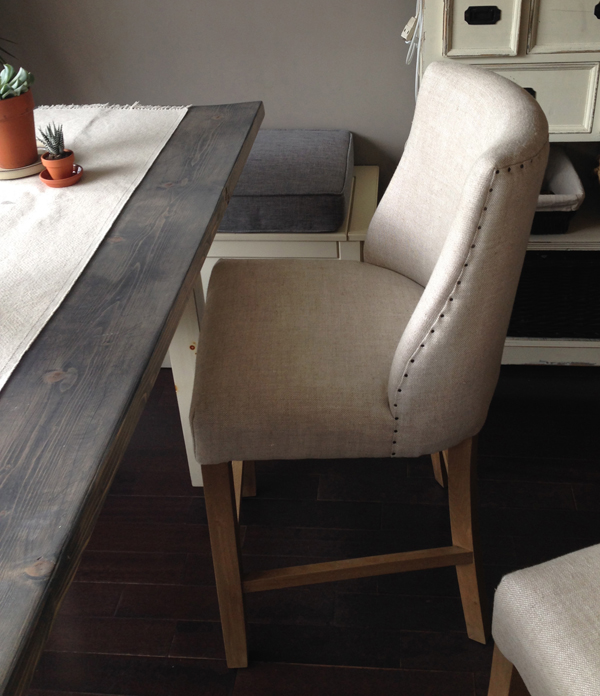
BUY IT OFF THE SHELF – Counter Chairs
I bought the perfect counter chairs at RH. I would have preferred the ones with the dark legs but that would have been 8-week delivery time. These were delivered within a week but had the weathered oak legs and the oatmeal-coloured fabric which were not my first choice but nevertheless totally work. They were discounted but still US$309 per piece. Hey….I basically saved $1000 on making my own custom table, so this is how I rationalize the chairs.
Chairs are important. Chairs are to sit on. 90% of bar stools and counter stools out there are uncomfortable. They all look trendy and awesome but back support is often really lousy. It was very important for me to have comfortable chairs. I have a bad back myself and my parents are well into their seventies and love having breakfast and lunch in this nook whenever they come for their summer visit from Holland. You don’t put seniors on crappy stools. Full stop.
THE FUN PART – DRESS IT UP
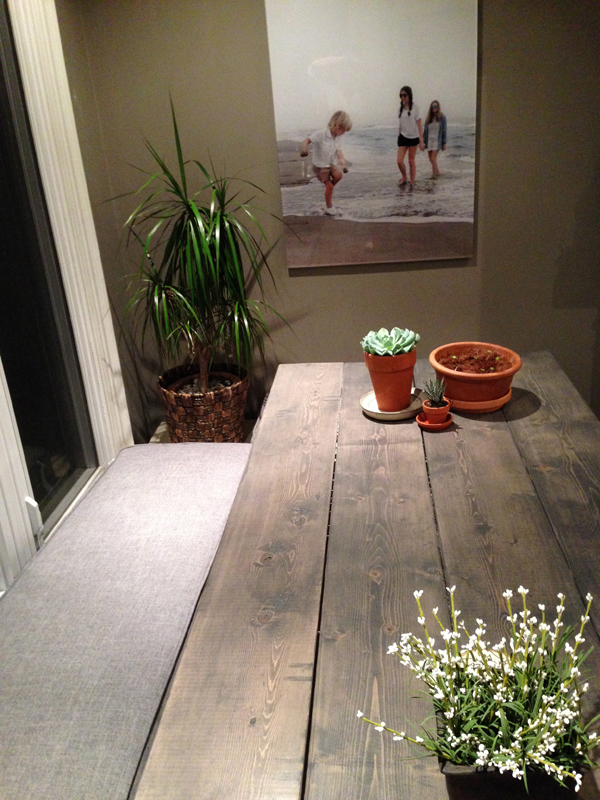
One of my favourite parts of the new nook is the photo of my kids. I made this photo last year in the most southern part of the Camarque, in the French Provence. A very unusual beach scene…steam came of the water and the colours of sand, sea and sky all blended together in a really pretty, de-saturated way. I did some very minimal colour adjustments on the photo (slight additional de-saturation). I wanted the photo to be displayed as is…simple. Something without any frame but with a quality and substance to make it look more art versus “family pic on the wall.” I had Blacks put it behind a ¾” acrylic top and it turned out amazing. Warning: the acrylic is very heavy so make sure to hang this kind of thing well (double screws, heavy duty, plugs etc – there are lots of options out there right now at your hardware store…just check and know your wall: is there a place you can put your screw into a support beam, is it straight on the weaker part of dry wall, etc).
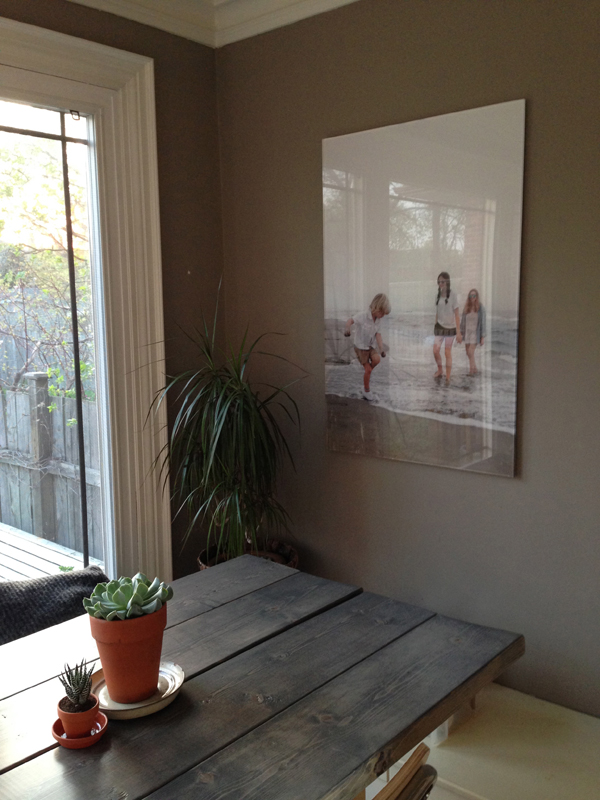
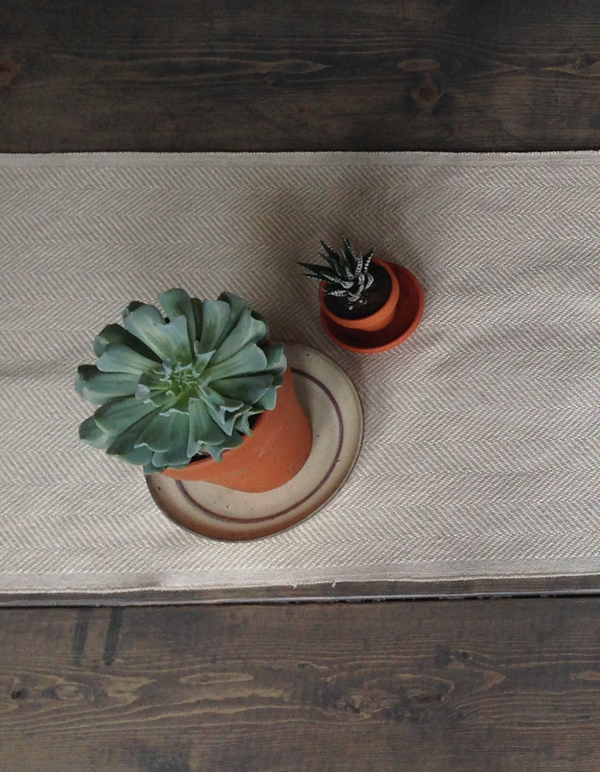
I added some plants (fake and cacti) because the nook gets sun all afternoon. I also added a cream runner and some pillows I already had.
The basic color scheme is completely consisting of neutrals and I did this on purpose so I can add seasonal colors to switch things up temporarily. For example, I can add some lemon throw pillows and placemats to switch up the scheme for summer time (lemon goes amazingly with grays). I can add more whites and silvers for Xmas or even rustic, old-school dark green and red. You get the idea.
Hope you like my new nook. We love it and hang out here all the time. We even use it now for evening appetizers during the weekend when the weather is too cold to do it in the backyard. Just add candles!


Very nice Lies, have you considered re-finishing the legs of the stools to be the colour you were wishing for?
good idea Mandia. I could totally do that and might. i was somewhat reluctant to take a brush to an expensive brand new chair, but hey..why not?
I have been pondering an acrylic oversized photo for some time now…this is the inspiration to do it — the whole space looks gorgeous!
Thanks Jessica. Re: acrylic oversized. do it do it. Its so nice and timeless. I am really digging it and am going to do some more around the house.I am a little over the big frames.
Great Job Liesbeth! Love it! Very impressed with your table DIY!
Thanks AM. I was a little bit proud of myself too.
Looks amazing! And the photo is my favourite part too. It’s perfect there.